Smocking is a beautiful art form on clothing that has been around since the 16th century and some historians think it was used as early as 13th & 14th century. During these centuries, garments were basically large squares of fabric sewn together, so a technique called smocking or pleating was used at the top of the fabric, to help create shape and movement. It was used in aprons, cuffs, sleeves, and necklines to draw fabric together around that part of the body as no curves were cut or sewn into garments yet. At the same time, below the smocking, fabric was able to flow freely allowing for movement in the rest of the garment around the body.
This sewing technique, which can now be done by machine, first started out by painstakingly hand stitching evenly spaced stitches to create pleats in fabric. The pleats were then joined together with embroidered thread, using various patterns to either control the fullness of fabric and help to create elasticity.
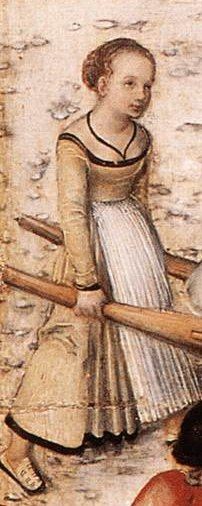
There are several different examples of smocking in historical paintings, but I’m going to focus on one type of garment, an apron. In the 16th Century, every day aprons were unbleached and black and white linen aprons were used for special occasions. Some of the examples below, from the 14th and 15th century looked to be smocked at the top in what looks like a honeycomb pattern. Theses examples were found in historical drawings in books as well as paintings:
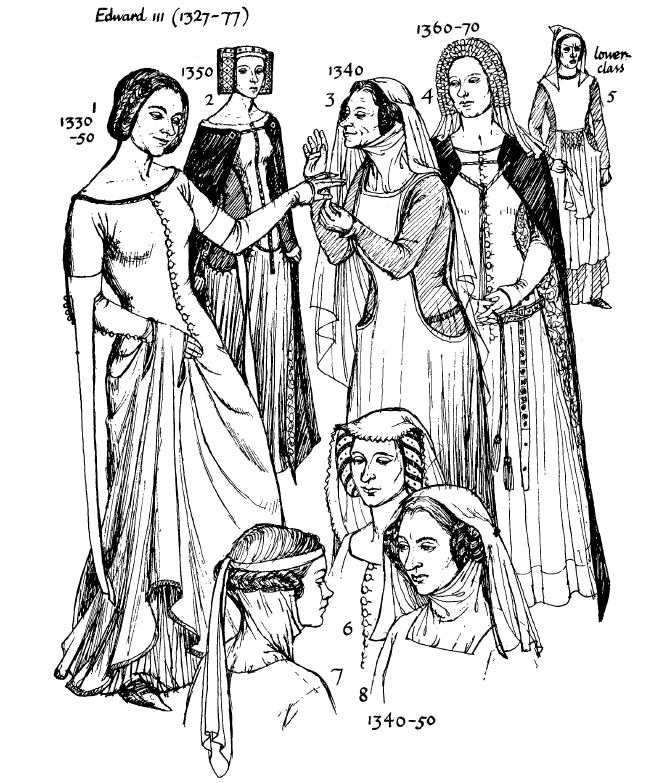
Historical Costumes of England by Nancy Bradfield pg.40
Figure # 5 Apron of the lower class during 1327 to 1377
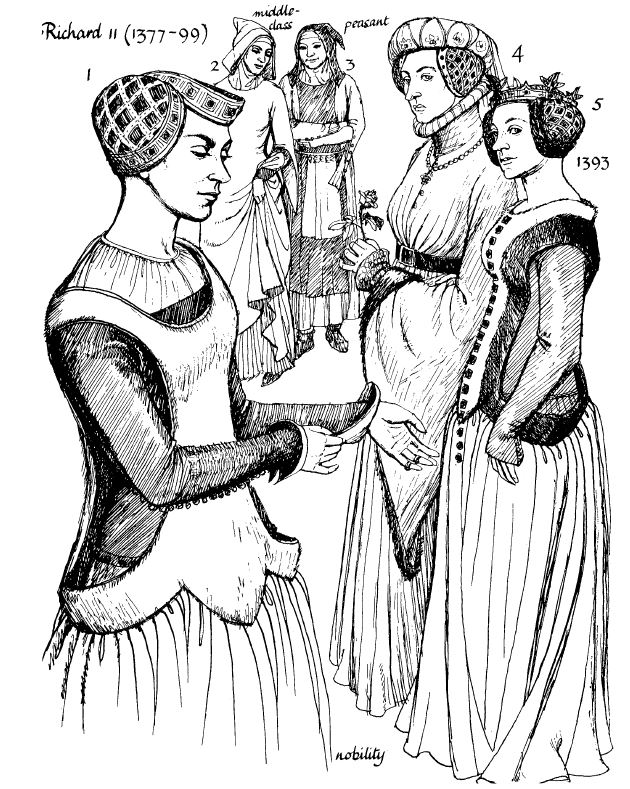
Historical Costumes of England by Nancy Bradfield pg.44
Figure #3 Apron of the peasants during 1377 to 1399
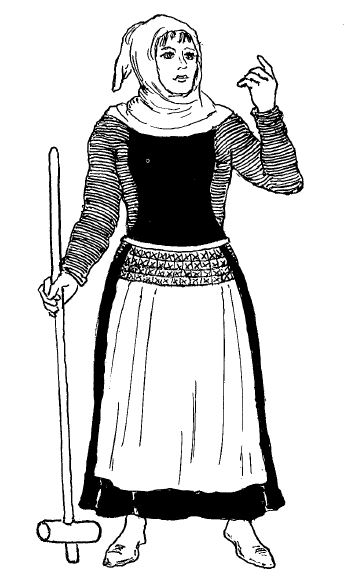
Costumes of Everyday Life by Margot Lister pg. 39
Apron of a peasant women in the 14th Century
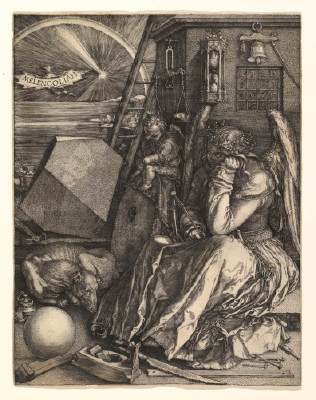
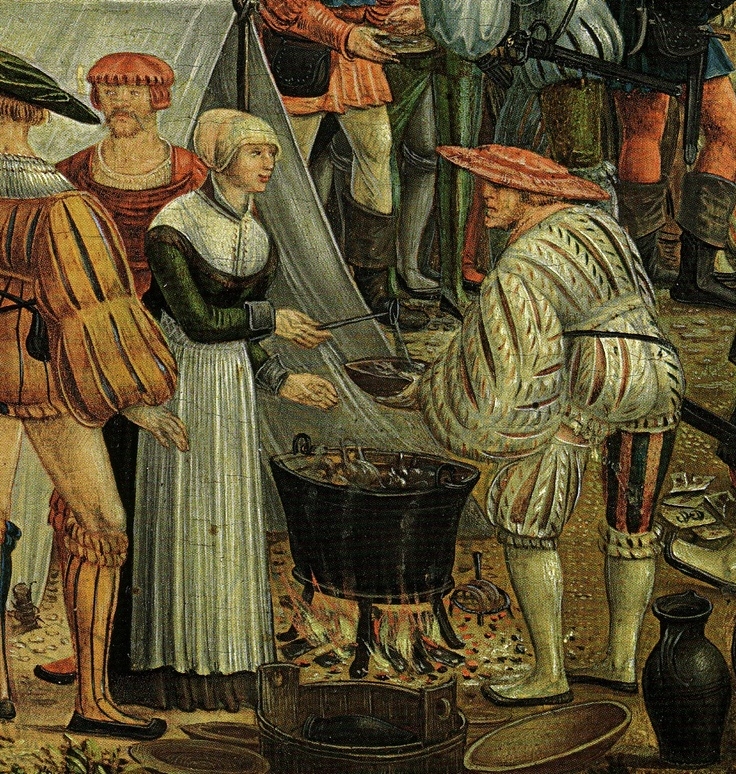
DÜRER, Albrecht Melencolia I1514
Engraving, 239 x 189 mm Kupferstichkabinett, Staatliche Kunsthalle, Karlsruhe
Detail from CRANACH, Lucas the Elder, The Fountain of Youth 1546
Lime panel, 122,5 x 186,5 cm, Staatliche Museen, Berlin
Detail from Feselen, Melchior, History of Cloelia, 1529
Alte Pinakothek, München
In reviewing the following publications, I found that there are several sewing methods to achieve the honeycomb pattern.
Priscilla Smocking Book by The Priscilla Publishing Co.
Instruction in Smocking by The Butterick Publishing Company
Weldon’s Practical Smocking by Weldon & Co.
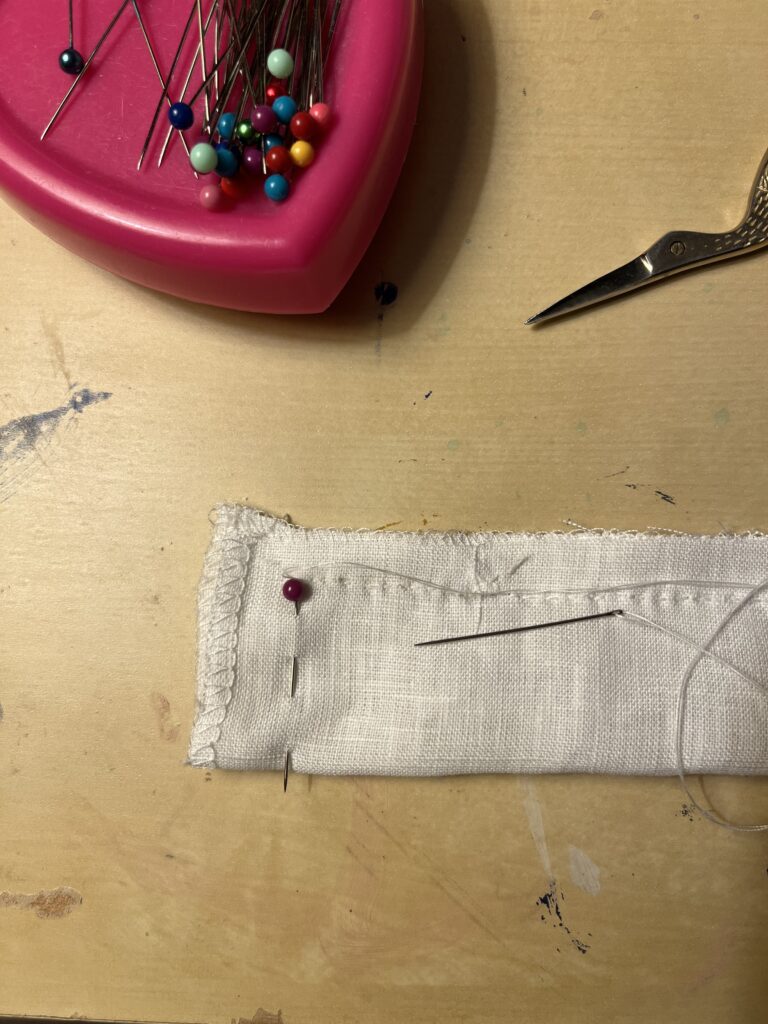
Using some scrap fabric, I handstitched the honeycomb patterns using two of the methods, before decieding on which pattern to use for the apron.
Method 1
Mark fabric, using a water-soluble pen, in a 1-inch grid pattern
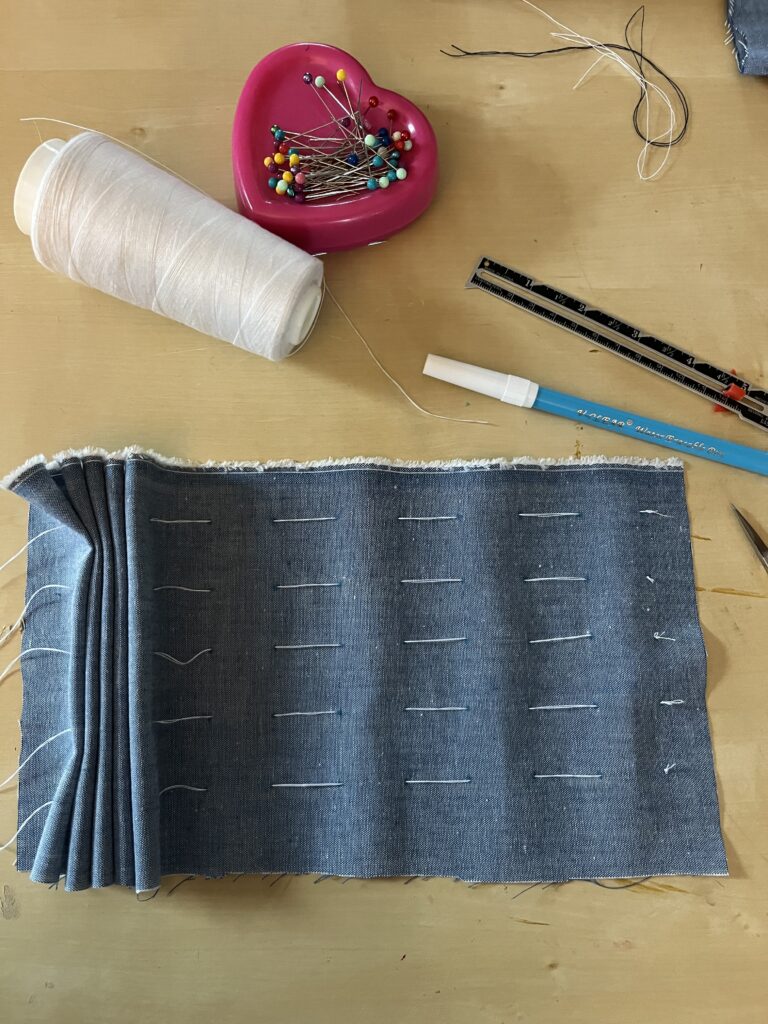
Knot a long length of thread and hand stitch a basting stitch across the fabric horizontally through each dot. Cut thread and repeat down each row
Pull the basting thread together to form the fabric into pleats
Starting at the first row of the marked pattern, use a needle and contrasting thread to connect two of the pleats together staying in line with basting stitches, knot, and repeat across the row
Repeat on the second row of basting stitches, but connect alternate pleats together
Repeat on the third row connecting the same pleats as on the first row
Repeat on the fourth row connecting the same connected pleats on the second row, etc…
Remove basting stitches and stretch out fabric
Method 2
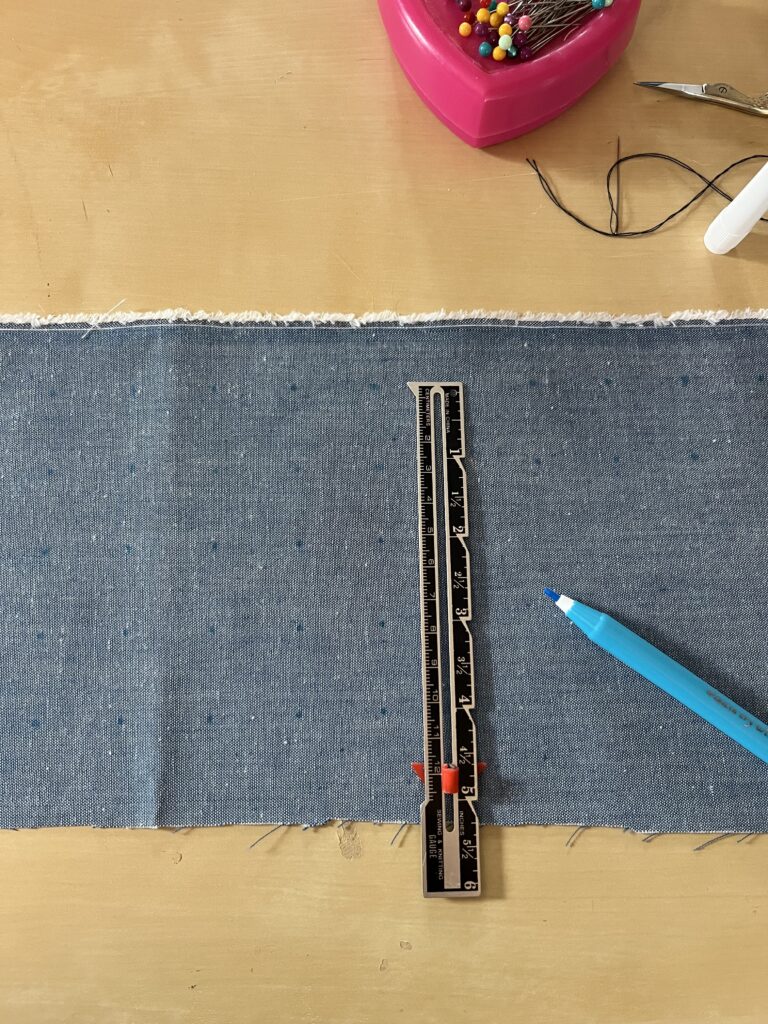
Mark fabric, using a water-soluble pen, in a ½ inch grid pattern
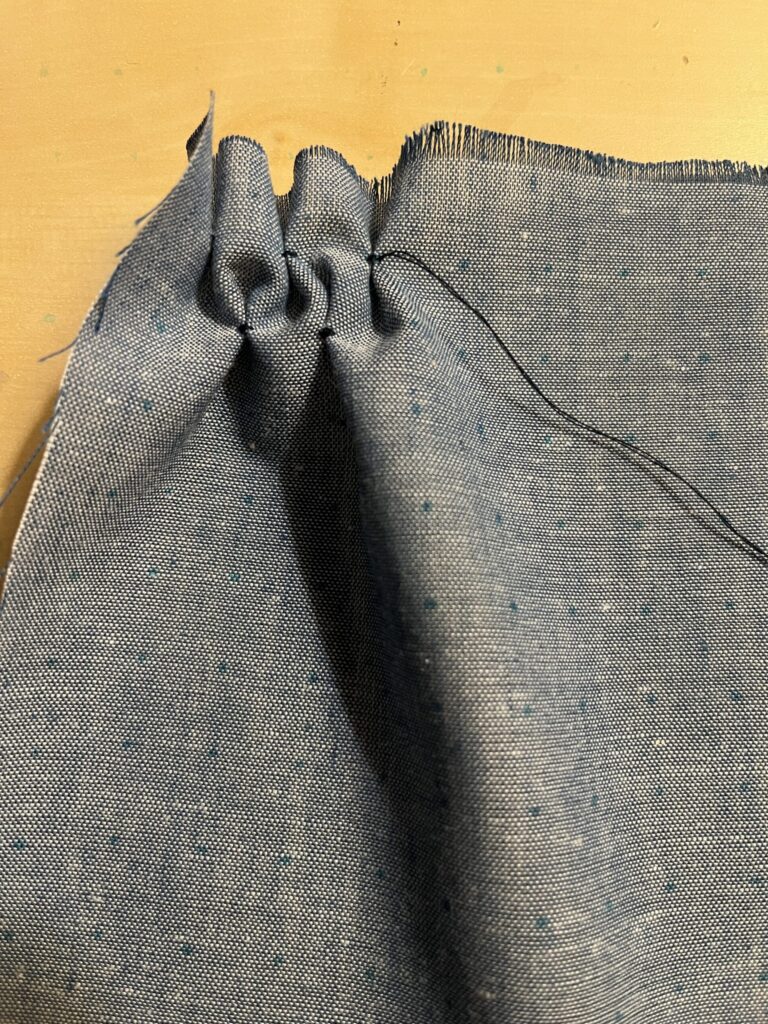
Stitch dotes together, with a contrasting or matching thread using the following pattern on the right and instructions below.
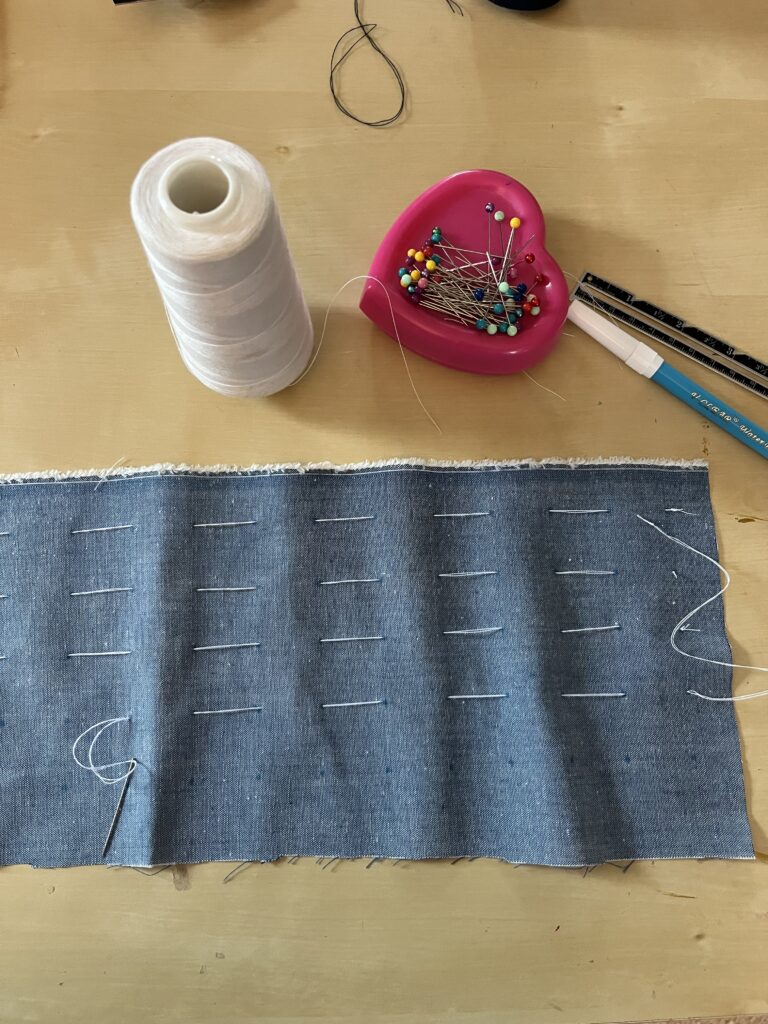
Come up through A and sew A to B together on top of the right side of the fabric forming a fold behind the sewn dots.
Put the needle in at B and come up through C, but do not pull the thread tight on the wrong side of the fabric between B and C, it should be the same tension and length of the fabric. For all the red arrows do not pull the thread tight between those dots.
Connect C and D dots together forming a fold behind the sewn dots
Put the needle in at D and come up through E, and again, do not tighten the thread on the wrong side of the fabric
Connect E and F together, and repeat down to G and connect G and H together, and so on
The second method uses a lot more thread and is more time-consuming, but it was more relaxing after getting into the rhythm of the pattern.
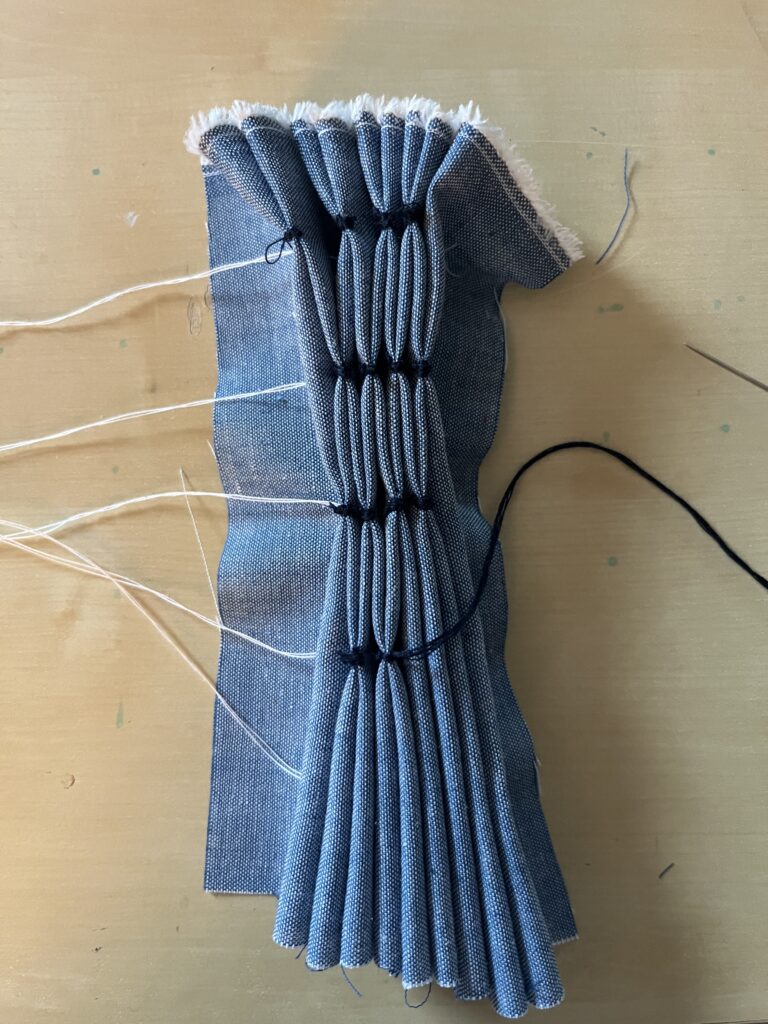
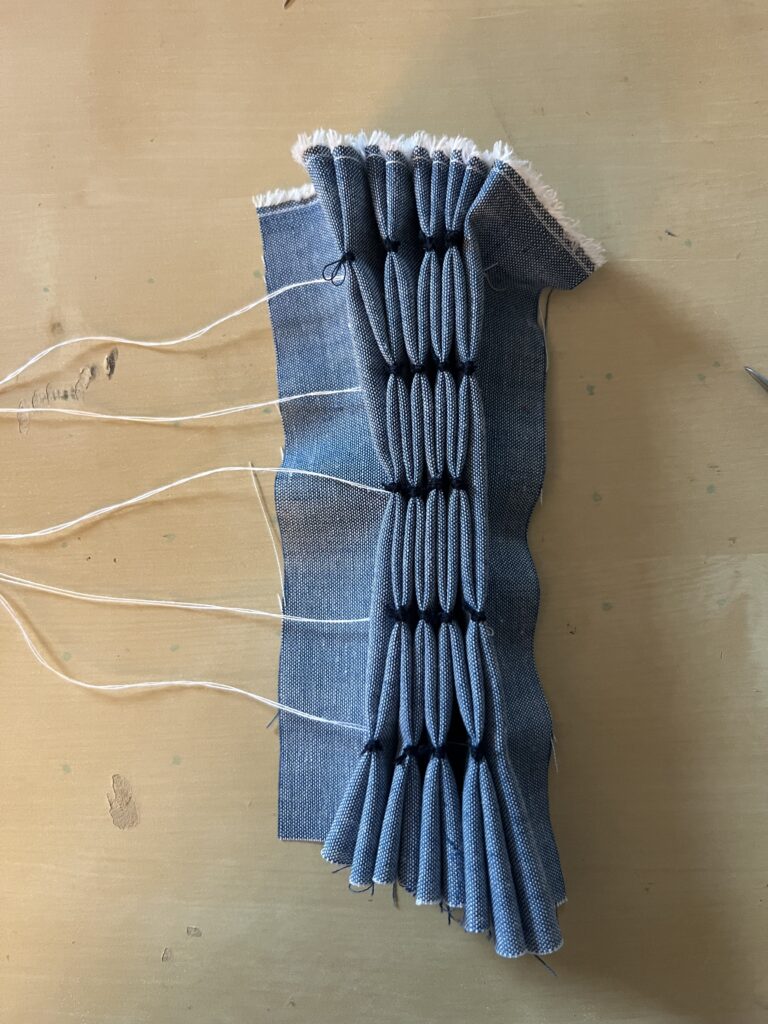
First “two” rows complete
Four rows done and row five and six started
Back view of the honey comb stitches
Hand stitched Apron
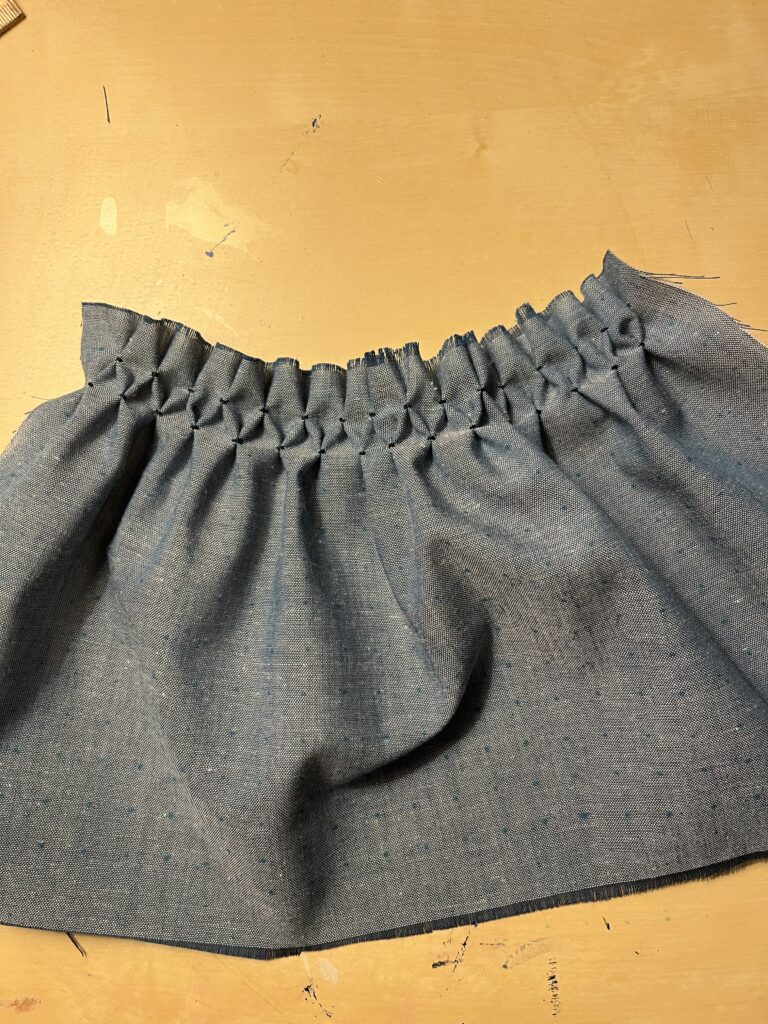
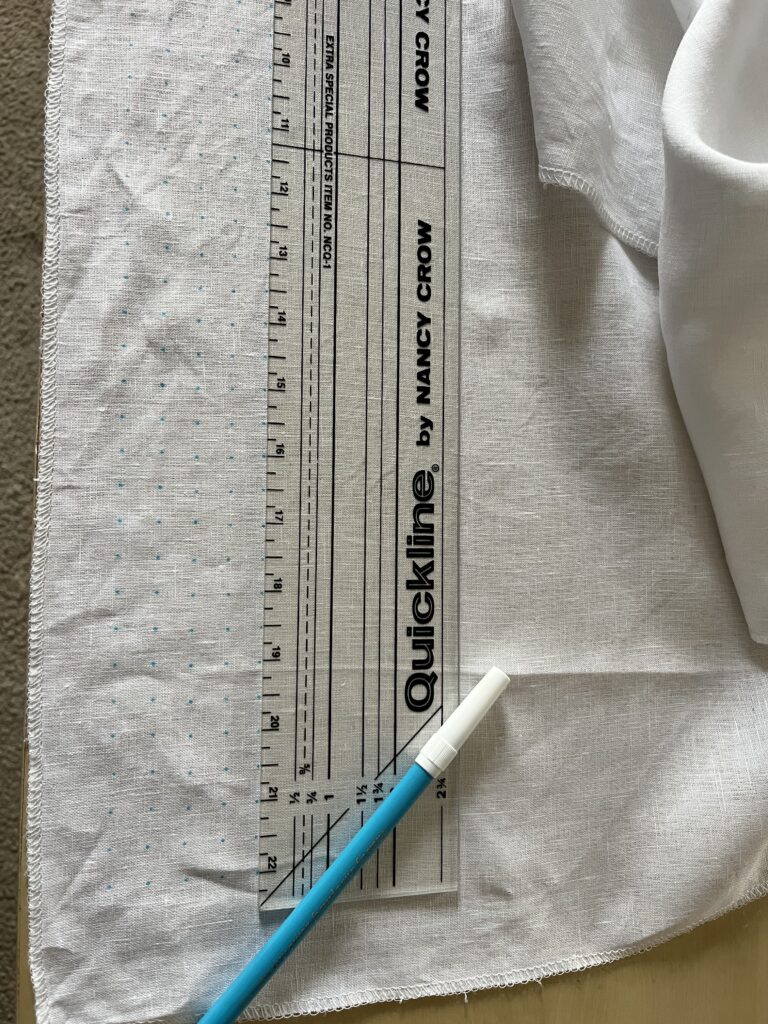
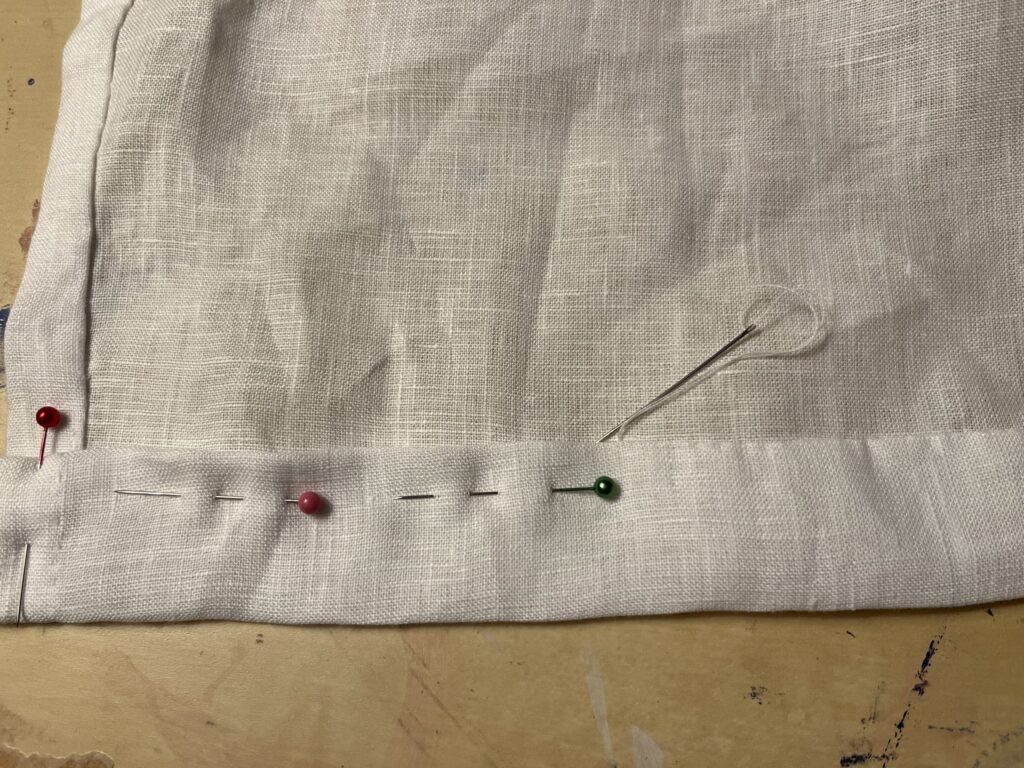
To make the apron, I bought 100% white linen fabric, which I pre-washed in cold water and hung to air dry. The fabric was already serged on the edges, so I used one of the edges for the top of the apron. After ironing the fabric, I cut the main apron section 40″ x 35.5″, and the apron waistband/ties section 70″ x 3.5″.
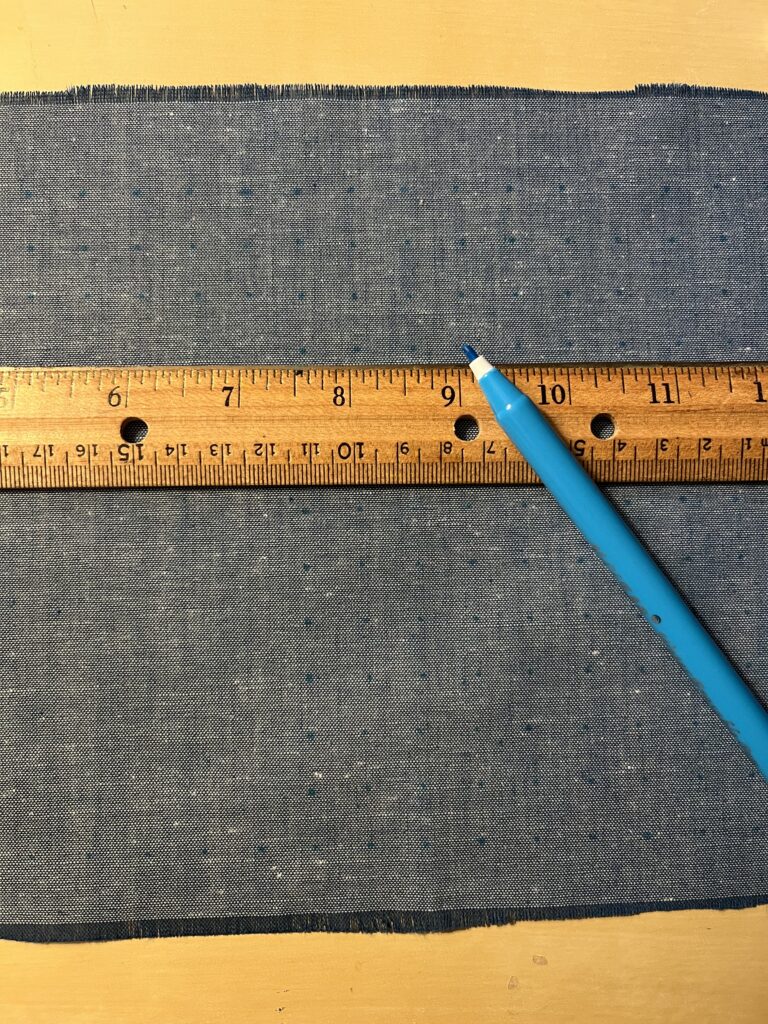
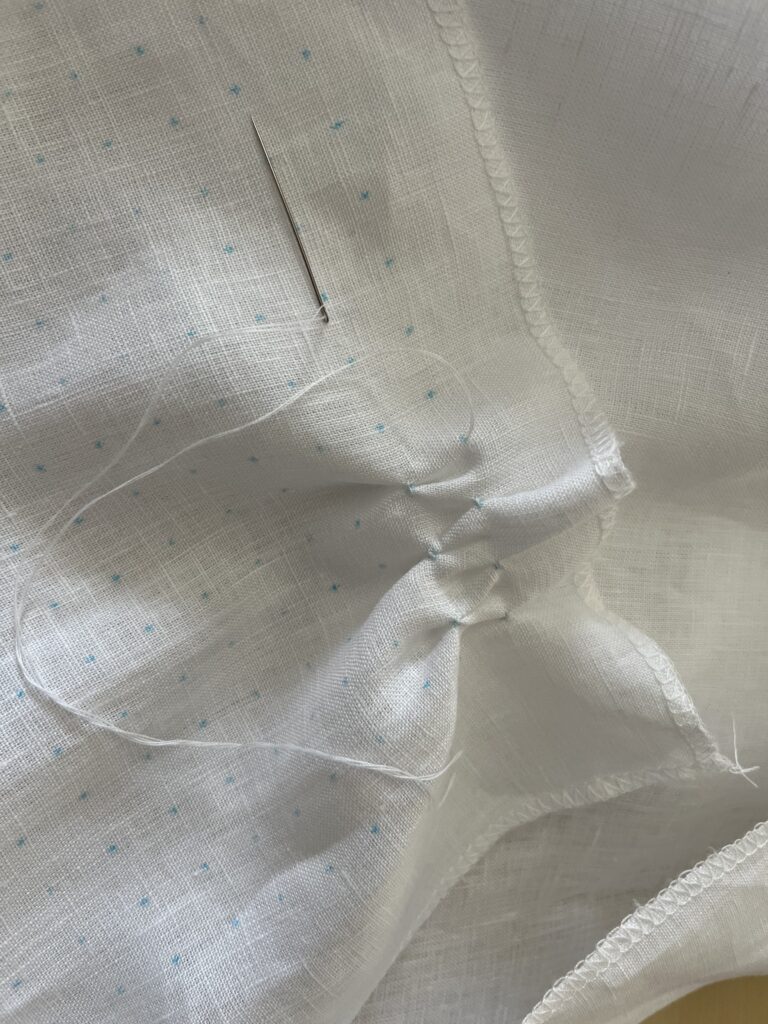
I tested a piece of the fabric with the fabric pen to make sure it washed out, and then 1 inch from the top, I started marking ½ inch dots across the top of the apron. I decided to go with method 2 for honeycomb smocking as I felt like I could get the pattern to be more accurate, and I did not like tying off knots for every point of the design.
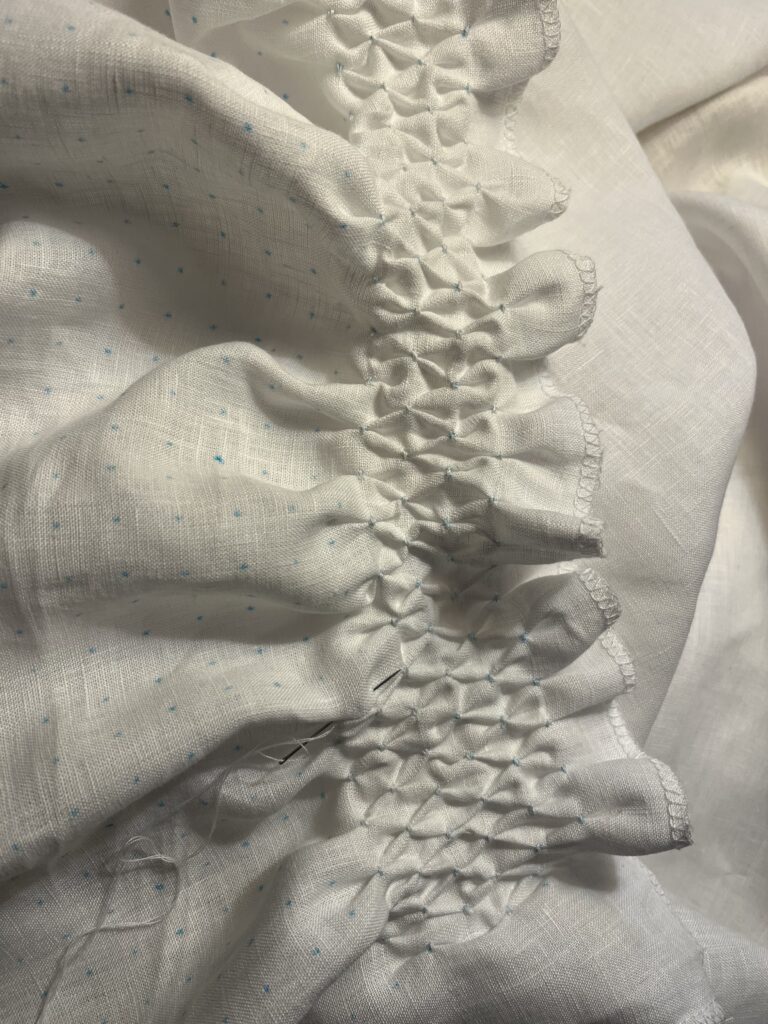
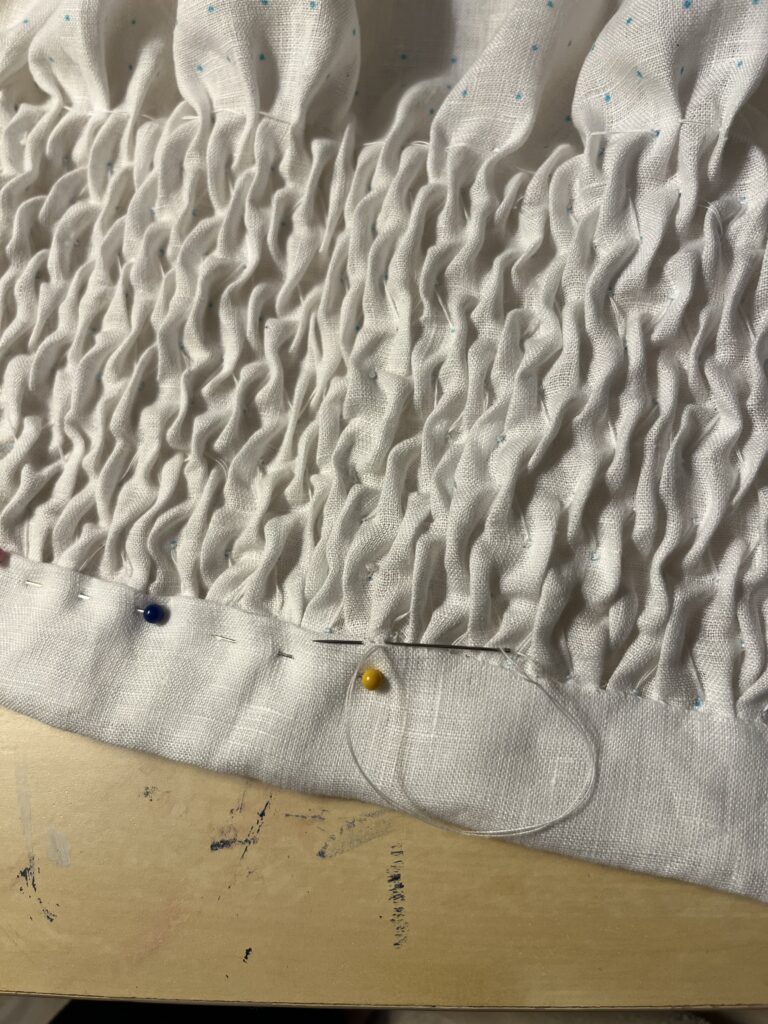
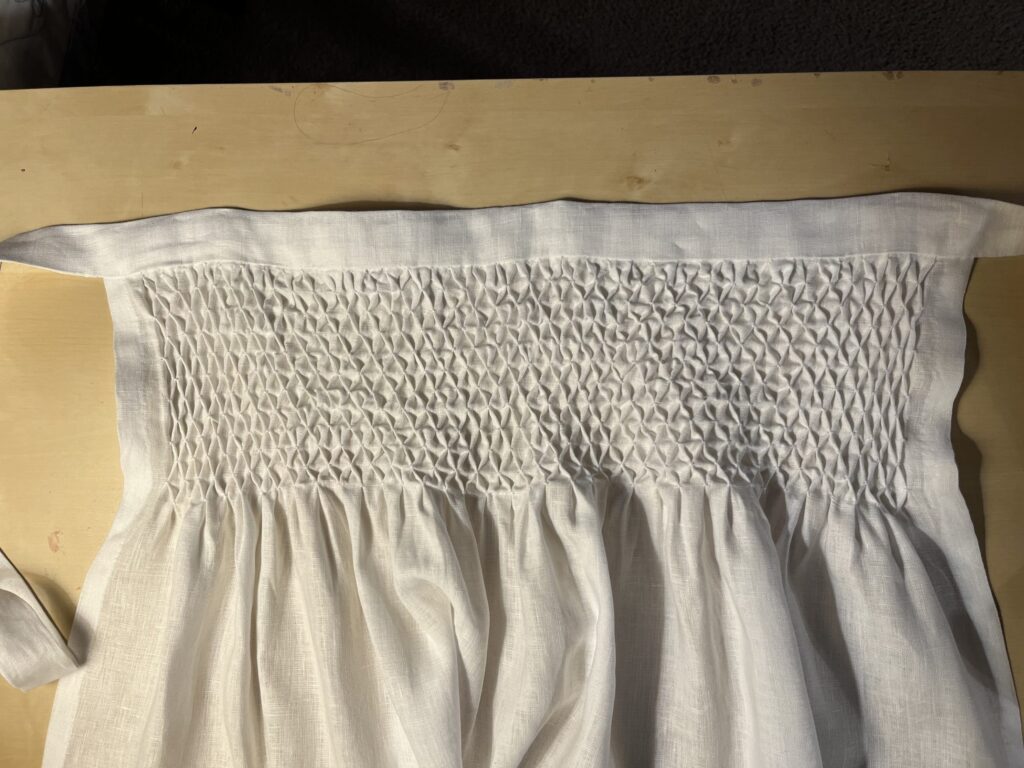
I marked out 14 rows of dots, and sewed the rows together using method 2 above. I stopped at row 12 as I really liked how it looked and volume of fabric gathered together was very nice.
Marking dots 1/2 inch apart
Stitching the dots together
Stitching rows five and six
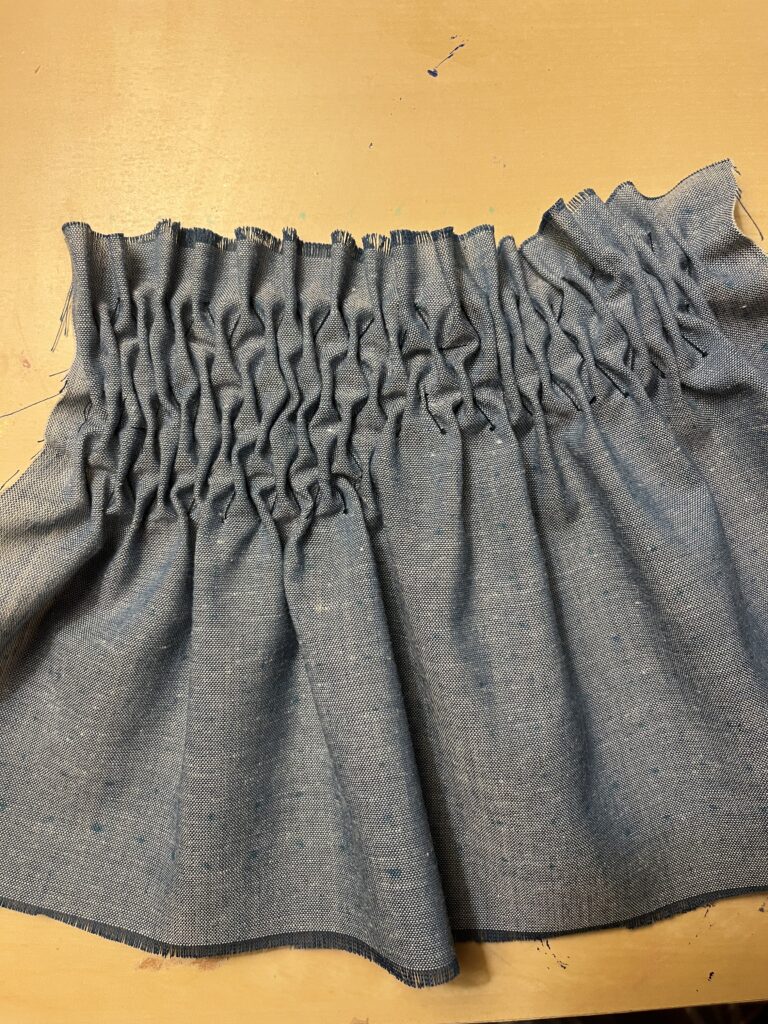
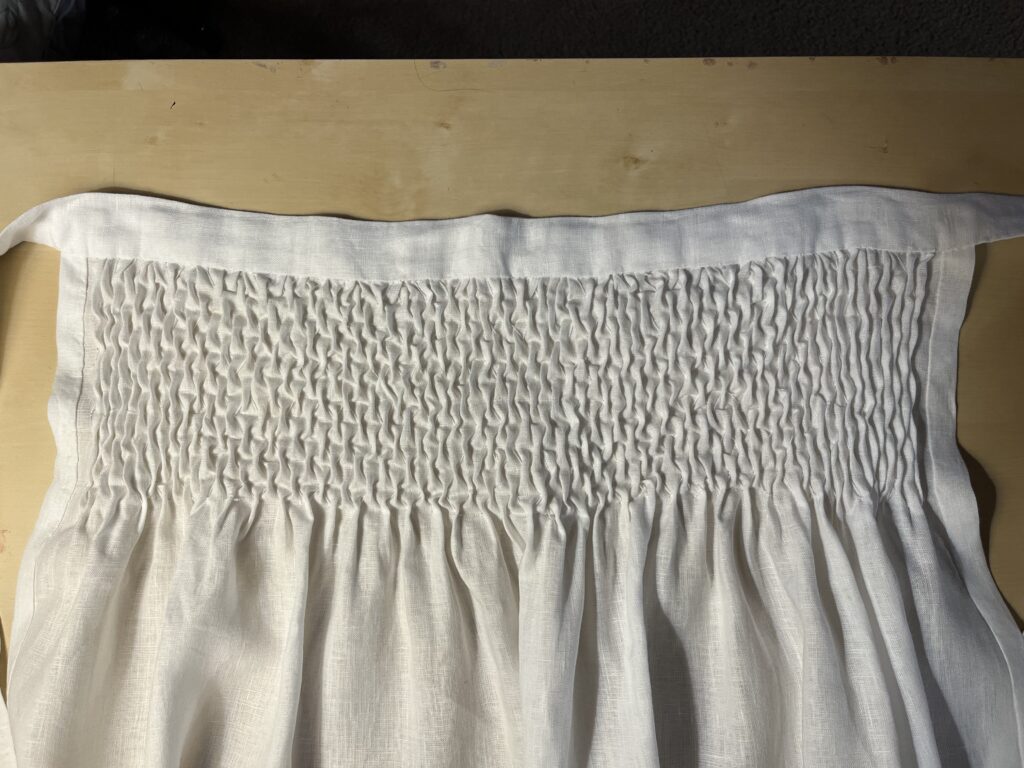
Backside of the smocking
Continuing down the rows
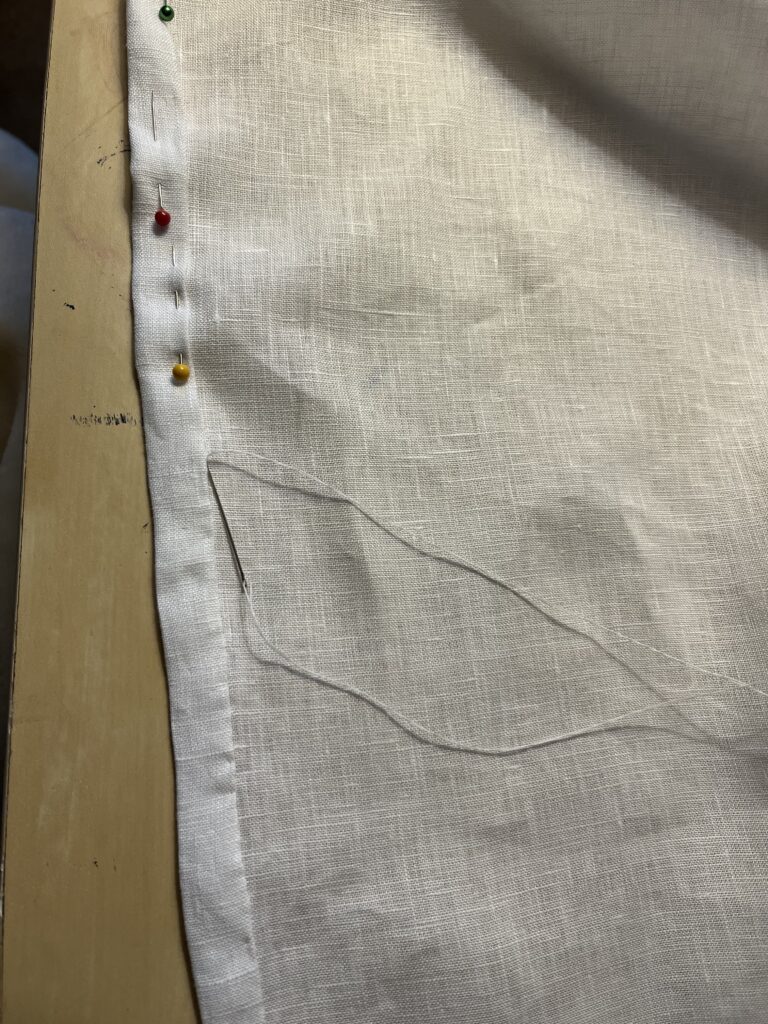
Hand stitching the side hem
Stitching the apron ties
Stitching down the waist band
Stitching the hem
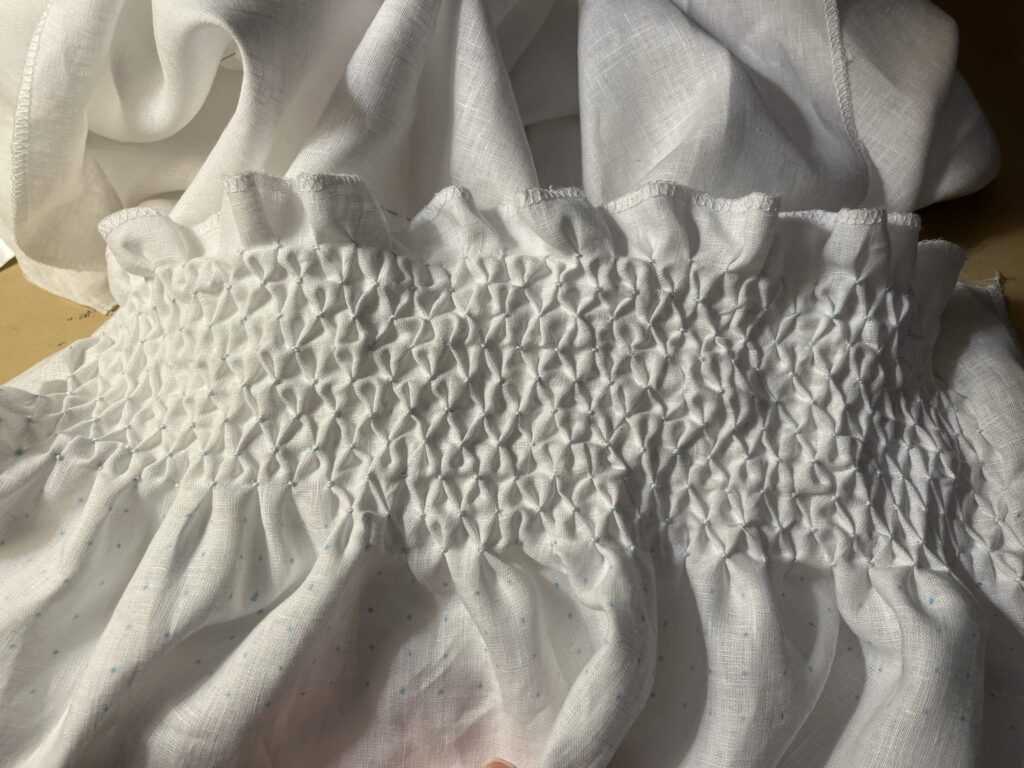
Honeycomb stitches all finished
Back view of the stitches
Full apron
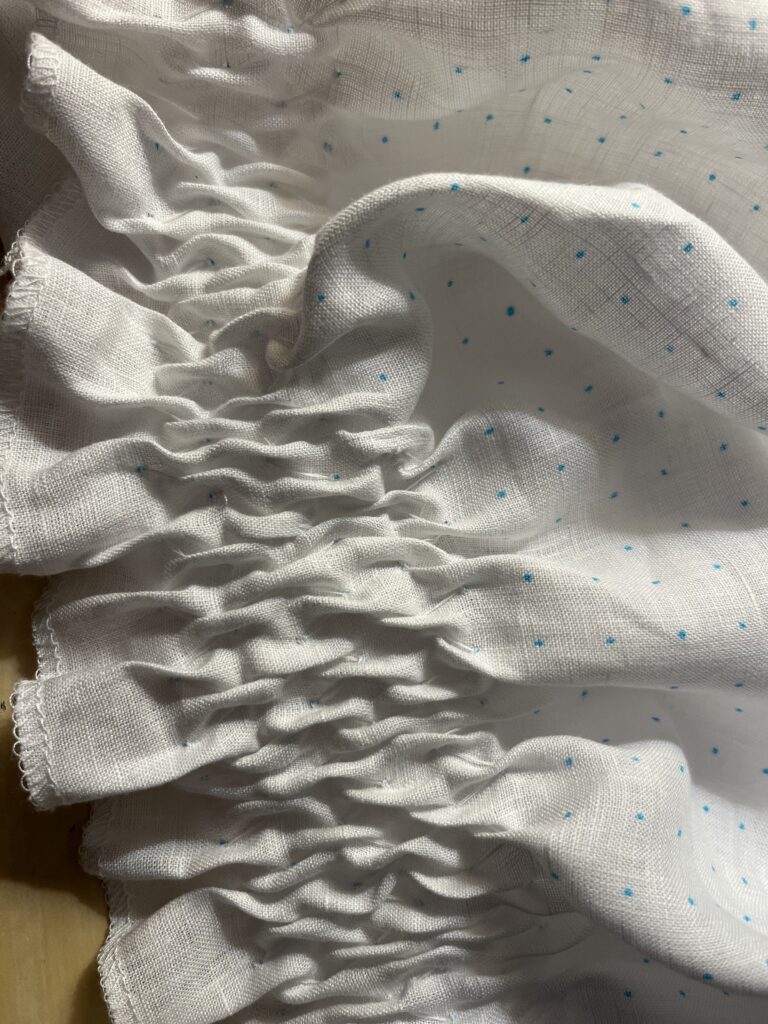
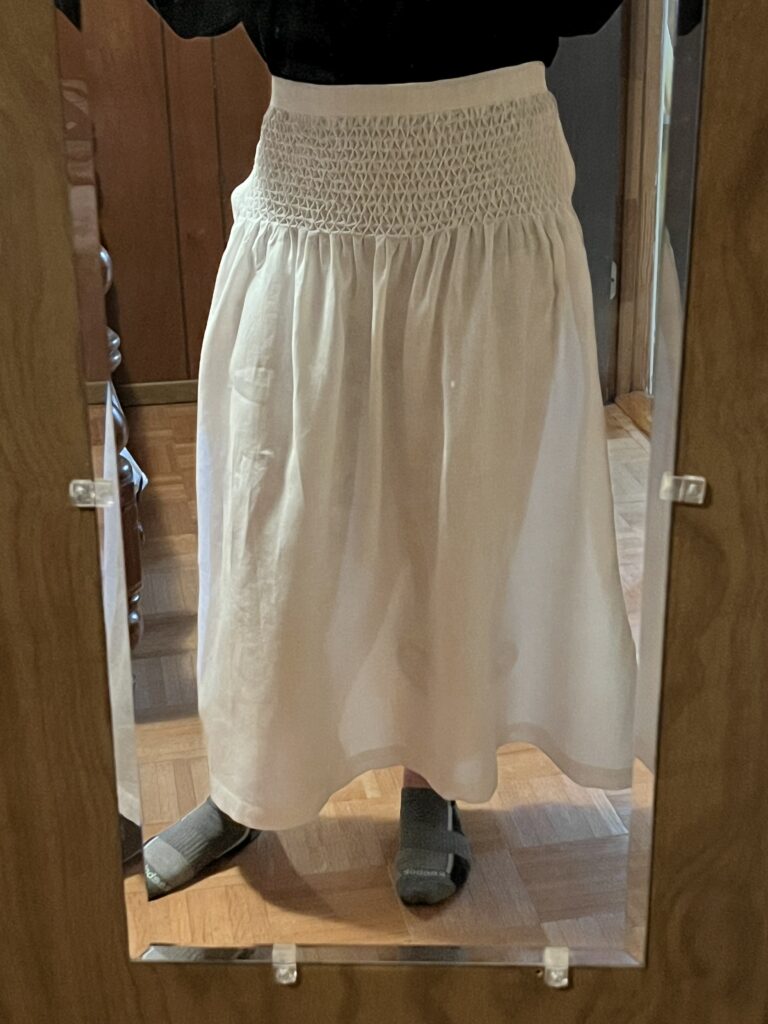
I can definitely see how this might have provided extra room for movement in the garment, but the pattern I used did not gather as much fabric together as I thought it would. I was expecting a little more fullness in the apron skirt, and this might have happened if I have used either a 3/4 or 1 inch pleat pattern instead of 1/2 inch. After washing out the fabric pen dots, the smocking did tighten up as you can see in the back view on the right side, but after steaming the fabric, this loosened the honey comb design back out, so I decided to not steam out all the design for the picture.
I’m very pleased with how this apron turned out and maybe the only thing that I would do differently would be to change the color of my thread so it did not match the fabric exactly. I had thought about using a red or navy thread , but with the white linen, the backside thread would have shown through too much, so I stayed with white thread. Moving forward with other smocking projects, I would definitely be changing up the thread, so the pattern of the threads stands out more.
References
Bradfield, N. (1997). Historical costumes of England : 1066-1968 (1st Costume & Fashion Press ed.). Costume & Fashion Press.
Flynn, Louise. (1916). The Priscilla smocking book, a collection of beautiful and useful patterns, with directions for working. The Priscilla publishing company, c1916.
Lister, M. (1972). Costumes of everyday life; an illustrated history of working clothes. ([1st American ed.]). Plays, inc.
(Instruction in smocking 1916) The Butterick Publishing Company c1916.